Monday, September 29, 2008

Tart au Citron

Recipes like this one frustrate me. You know the type. You measure everything exactly. You use the exact size tin the recipe asks for. Yet somehow you end up with almost 3 times the amount of pastry needed to make the tart. How? I do not know.

If I had been making this in the middle of the day I wouldn't have been as frustrated. I would have been excited to be able to make some mini tarts as well, with a different filling. But I was making this around 10pm (and I'm a bit of a nana when it comes to staying up late), so was merely annoyed at the waste of food.

Rant over - the tart came out really well, and actually tasted better the following day after sitting in the fridge for a while. It was pretty easy to make, and kept for 3 days (We would have eaten it much quicker but I am practising restraint - much easier said than done!)

Pastry
2 3/4 cups plain flour
150g unsalted butter
3/4 cup icing sugar
2 eggs, beaten
Sift the flour directly onto the bench. Make a well in the centre, place the butter in the well, and using a pecking action with your thumb and fingertips, work the butter only, until it is very soft. Add the sugar to the butter and mix, then add the eggs and mix. Now gradually add the flour until you have a rough dough. Bring together, knead a few times to make a smooth dough, cover in plastic wrap and place in fridge for at least 1 hour.
Preheat oven to 190C. Roll the pastry out to line a 23cm loose-based fluted tart pan. Chill in fridge for 20 minutes. Blind bake pastry for 10 minutes, then remove paper and weights and cook for a further 3-5 minutes, until pastry is just cooked.

Reduce oven to 150C.

Filling
4 eggs
2 egg yolks
1 1/4 cups castor sugar
3/4 cup double cream (thickened cream)
1 cup lemon juice
finely grated zest of 3 lemons

Whisk together the eggs, yolks and sugar. Add the cream, whisking, then the lemon juice and zest.

Put the pie tin on a baking tray and pour in the filling. Return to the oven for 35 - 40 minutes, until set. Cool before serving.
Recipe from Sweet Food.

Sunday, September 28, 2008

Pork Ragu

This is the recipe for the sauce that I used on my fresh pasta below. I got this from my sister (do you notice a trend here?), and she got it from Karen Martini. My sister calls this "The best pasta in the world" when she teams it with home made pasta. I have to agree.

I have played around with it a little, the main reason being that I couldn't get hold of the pork and fennel sausages that the recipe asks for. I used plain Italian pork sausages in the end, but it would definitely be better with pork and fennel. Try to find sausages where the meat is still a little chunky (and not minced), it makes the final product so much more special. The other major change I made was to the amount of liquid added to the sauce - the original recipe asks for 750ml of red wine. Yes, a whole bottle. I couldn't bring myself to add that much, and after making it, think it turned out just fine with half the amount.

300g good quality Italian pork sausages
3 sprigs rosemary, leaves removed
3 sprigs thyme, leaves removed
1 tsp fennel seeds, lightly crushed
2 bay leaves
3 tbsp olive oil
2-3 red chillies, finely chopped
1 carrot, finely diced
3 celery stalks, finely diced
1 1/2 onions, finely diced
3 tbsp tomato paste
1 tbsp brown sugar
1/2 bottle red wine
1 cup water
400g can diced tomatoes

Remove the skin from the sausages and crumble meat. Heat a heavy based pan, and cook sausage meat (with NO oil), stirring regularly until golden brown. Don't worry if it starts sticking. Add the oil and herbs, and stir for 1 minute, then add the chillies and vegetables and cook for 10 minutes, or until the vegetables begin to caramalise. Still don't worry about the sticking. Stir in the tomato paste, sugar, and season with salt and pepper.

Add the wine, and bring to a simmer. Now, scrape all of the yummy stuff that is stuck to the bottom of the pan. Add the water and tomatoes, and simmer for 1 hour, or until the sauce is thick.

Serve over your awesome home made pasta with some freshly grated parmesan cheese and the rest of the red wine.

Recipe modified from Karen Martini.

Thursday, September 25, 2008

Fresh Pasta - Yum!

I bought a pasta machine on Sunday, and immediately put it to good use. I have watched my mum make fresh pasta many times, but my job was usually to make a filling and then make the ravioli with it. So it is good fun now to make my own pasta. It is easy, cheap, and so so delicious.

I have seen many variations of pasta recipes... special types of flour, half flour - half semolina, so this one here is just what I find works for me. If you have a different way of making pasta, please let me know, I am happy to road test other ways!

300g plain flour (nothing fancy, just the usual stuff you have in the cupboard)
30g semolina
10ml oil
3 whole eggs
2 egg yolks
a pinch of salt
Sift the flour, semolina and salt directly onto your worktop. Make a well in the centre and crack the eggs into the well. Add the oil. Using your fingers, break the yolks and then work the eggs and oil into the flour. As the mix starts to come together, use your whole hand to scrunch the dough together. Once it has formed a ball, wrap in plastic wrap and pop into the fridge for 30 minutes.

Secure your pasta machine to the bench. Remove the pasta dough from the fridge and break into 3 or 4 pieces. Flatten out a little into a square shape. Starting with the widest setting on the machine, pass the dough through. The first few times the dough will be quite scruffy around the edges, so fold in half, turn 90 degrees and put through the machine rough edge first. Repeat this step until the edges are all coming out fairly square. (If you don't have a pasta machine, you can roll it by hand, however it can be difficult to get it thin enough. I got my pasta machine from House for only $39.95!)

Change the setting to the next width down, run the pasta through twice, then change the setting down again. Dust with a little flour if it is becoming sticky. Continue with this pattern of running the pasta twice through each setting until it has run through the thinnest setting. The pasta will have stretched to be much longer than first anticipated! Repeat for the rest of the dough.

I was making rough-cut pasta, so I then cut the pasta by hand. You could run it through the cutters on your pasta machine if you want more uniform pieces, but I quite like the fact that mine are all different size and shapes... it proves that it is home made!!
Hang the cut pasta over a coat hanger/rolling pin/broom handle if you are not cooking it immediately after cutting, otherwise it will stick together when you cook it.

Cook in plenty of well salted boiling water for about 2 minutes, and then stir through your favourite sauce and marvel at how easy it was to make!

Wednesday, September 24, 2008

Donna Hay's Meat Pies

I love meat pies. I mean, loove meat pies. I could live off meat pies if need be. I almost think they would be one of my desert island foods (along with chocolate, ice cream and cheese of course!)

I also love making pies at home. Mince, lamb, beef, chicken, you name it, I will have probably put it in a pie. Pies are one of my ultimate comfort foods... chunks of meat, gravy oozing out, and crisp buttery pastry. Not to mention the mashed potatoes and mushy peas!

This recipe is to make 6 individual pies (9cm base x 11cm top pie tins). I prefer to have the pastry both bottom and top, but it is just as nice with only the puff pastry top if preferred... if anyone is crazy enough to give up the extra pastry! And if my partner (the mushroom hater) is not home for dinner, I add big field mushrooms to the mix - yum!

350g ready prepared shortcrust pastry
375g ready prepared puff pastry
1 egg, lightly beaten
Filling
1 tbsp oil
2 onions, chopped
1.5kg round or chuck steak, cut into 1.5cm cubes
1 tbsp tomato paste
4.5 cups beef stock
1 cup red wine
1 tbsp worcestershire sauce
2 tbsp cornflour with 1/4 cup water

Preheat the oven to 180C. Heat the oil in a saucepan over high heat, add the onion and cook until soft. Add meat and cook for 5 minutes or until sealed. Add the tomato paste, stock, wine and worcestershire sauce and simmer, uncovered for about 1 hour, or until the meat is tender. Blend the cornflour and water in a small bowl to a smooth paste. Add to the beef mix and stir until the mixture has thickened and returned to a simmer. Taste and check that the flour flavour has cooked out. Season with salt and pepper and set aside.

Roll out the shortcrust pastry until 3mm thick. Cut out 6 pie bases (size above), rerolling the scraps if needed. Spoon in the filling. Roll out the puff pastry to 3mm thick and cut out the lids. Place on top, trim if needed and press the edges of the pastry together. Brush the tops with the beaten egg, and make a small slit in the tops. Bake for 30 minutes or until the lids are puffed and golden.

You can pretty much make any size pies with these... you will know they are cooked because the lids are puffed golden domes and you will be drooling when you see them!

Tuesday, September 23, 2008

Peas and Spinach with White Wine


This recipe is dead easy, takes about 6 minutes to make, and tastes brilliant. It is perfect for making whilst your roast is resting on the bench, as it stops the urge to carve the roast too early! (Is it just me that gets that urge? The smell of the roast is hard to resist!) I served it with the pork belly below.

2 spring onions, sliced
1 cup peas (fresh or frozen)
1 glass white wine
4 handfuls spinach
olive oil
butter (as much or as little as your hips can handle!)

Heat some oil and a knob of butter in a pot, and slowly fry the spring onions for a couple of minutes. Add the peas and cook for another couple of minutes, add the wine, bring to the boil and then simmer for a minute or two. Add the spinach, and turn over with tongs until the spinach is wilted. Add another knob of butter, season and serve.

Recipe from Jamie Oliver's The Return of the Naked Chef.

Sunday, September 21, 2008

Slow Roasted Pork Belly with Baked Apples and Onions (Oh my!)

I first saw this on stonesoup, and originally asked my sister to cook it for me next time I was to visit. You see, she is the much better cook when it comes to all those slow cooked, hearty comfort foods. And her oven has temperature settings.

Then came the first Saturday of Spring. I had plans to get up early and head to the Grower's Markets... but mother nature had other plans. It was just raining so much that day that I rolled over and went back to sleep. Click here to see what a much braver foodie discovered by braving the rain that day!

So what else to do on a really rainy stay inside day? Slow cooked roast of course! I huddled under my umbrella to go to the butcher (admittedly the only time I stepped outside all day!) and buy my first ever pork belly. I had the butcher score the skin, remove all bones, and he also cut a pocket into the inside of the belly so that my stuffing wouldn't fall out when I rolled it up. He was then nice enough to supply some kitchen string for trussing as well.

Home again, and I attempted to not ruin this beautiful piece of meat. The first step was to roast some garlic in it's skin... and I promptly managed to explode a clove in my oven. And I mean explode - it must have burst into a million tiny pieces. Note to self - cut small slit in garlic skin before roasting! 30 mins of oven cooling and scrubbing later (my kitchen is tiny, and the oven is in an awkward place for cleaning - especially when hot), I was ready to go again.
I stuffed, trussed, oiled and salted the belly, sliced the onion and into the oven it went. The recipe says to start with the oven at 250C then reduce to 160C. Now, since I have no oven markings, the only exact temperature I am able to get is 200C (straight down) and I have almost figured out 180C (bake much?) Everything seemed to be going along nicely, until I realised that I had waited too long to put my potatoes in the oven. Of course, 160C is pretty low for roasting potatoes, so they would need longer than usual, but I hadn't factored this in.

And then there was the blackened burnt stuff on the bottom of the pan that was supposed to be cooking juices. I was hoping to use these to make a quick sauce whilst the meat was resting, but no, there was no juice to be seen.

Aside from this, (and the slightly underdone potatoes) this turned out to be a perfect rainy day dinner. I will admit to eating WAY too much, but being very glad for it! I served it with spinach and peas cooked with white wine, which I will post the recipe of later.
Visit the stonesoup for the recipe and a lot of drool-worthy photos.

Friday, September 19, 2008

Ow!

Sorry this isn't a food post... I cut my thumb today and it is quite significantly padded at the moment which makes both cooking and typing a little awkward! So instead, I relaxed at a local bar with some friends and a few icy cold brews. Will try and post something more exciting tomorrow!

Wednesday, September 17, 2008

Strawberries with Balsamic Vinegar


I got this one from Tobie Puttock's Daily Italian. This book is supposed to be full of "cookable" recipes - not dishes that seem too complicated to make. And they do seem straight forward... if you have 5 hours for the dough to rest/rise or 2 days to slow cook your bolognaise sauce. So for this reason I was pleasantly surprised to find this simple recipe for dessert. It takes about 2 minutes to prepare, 5 to cook, and 2 to rest. I made it when my partner asked if there was anything sweet in the house, and I didn't feel like serving up plain vanilla icecream, yet was too full from dinner to make something complex!

And if the combination of flavours sounds strange to you, try it anyway. The sugar balances the vinegar and forms a delicious sauce for the warmed strawberries.

1 punnet strawberries, hulled (and halved if large)
1 tbsp castor sugar
1 tbsp balsamic vinegar

Preheat oven to 200C. Combine all ingredients in a bowl.

Take a large sheet of aluminium foil (Tobie suggests 40cm in length) and fold in half. Then fold each side in 2cm, leaving the top open. Stuff the strawberry mix in this hole, then fold over a couple of times to close and secure.

Place in oven and cook for 5 minutes. Remove and rest for a couple of minutes without opening the package. Whilst resting, spoon some icecream/cream/custard into serving dishes. Open package and share strawberries and cooking liquor amongst the bowls. Enjoy!

Tuesday, September 16, 2008

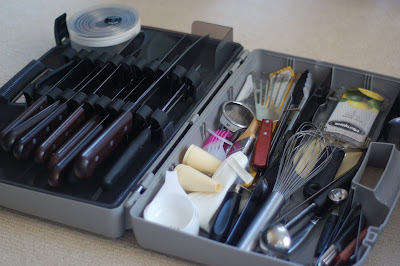
New Toys!

Just a couple of photos of the new toys that I picked up yesterday. Lots of kitchen fun to be had with these!!


Chunky Peanut Butter and Oatmeal Chocolate Chipsters


I know... just the name of these cookies is enough to wear you out. I first saw these when Steph from A Whisk and A Spoon posted about them, and got the recipe from Stefany at Proceed with Caution. I ummed and ahhed over whether to make these or not, but, as always, the cookies won out.

A word of warning - creaming this amount of butter, peanut butter and sugar by hand is very hard work. I spent at least half an hour wishing for an electric mixer whilst doing it! It wouldn't have taken as long if I had have waited for the butter to soften, but I was lacking patience when I made these.

I got about 45 cookies out of this recipe. Since I like my cookies chewy, I took them out of the oven after only 12 minutes. At this point, the cookies seemed to have not set at all, but never fear, they firm up as they cool on the rack. Just be sure to use a spatula to remove them from the tray - otherwise they will just collapse!

And thankfully, the boys at my partner's work were more than happy to make short work of these, so I didn't have to fight the temptation to eat all 45 myself - they are that good that I just might have!

True to all those who participate in Tuesdays with Dorie, I will not be posting the recipe here. Check out Proceed with Caution to see it, and enjoy!

Banana and Coconut Bread


Banana bread is something I make quite often, as we never seem to eat bananas before they are over ripe. Not that this is a bad thing, because banana bread is basically just melt, sift, mash, mix and cook. No creaming butter and sugar in sight - yay!

I modified the recipe this time, as I was out of milk, and didn't feel like braving the rain to get more. I found a can of coconut cream in the cupboard, and away I went. I also added one more banana than usual, to use up all those I had, and added some desiccated coconut to make up for the added moisture. The result? A stronger banana taste and the lovely texture of coconut. I would have preferred a more coconut-y flavour, but there were no complaints when I served this for breakfast!

1 and 3/4 cups self-raising flour
1/4 cup plain flour
2 tsp ground cinnamon
2/3 cup firmly packed brown sugar
almost 1/2 cup desiccated coconut
165ml coconut cream
2 eggs, lightly whisked
50g butter, melted, cooled
3 overripe bananas, mashed

Preheat oven to 180C. Spray an 11 x 21cm base loaf pan with cooking spray and line with baking paper, allowing it to overhang the two long sides.

Sift the flours and cinnamon. Add the sugar and coconut, and make a well in the centre. In a separate bowl, mash bananas, add milk and eggs, and combine well. Add banana mixture and melted butter to the dry ingredients and stir until just combined. Pour into loaf pan, smooth the surface, and bake for 45 - 50 minutes or until skewer comes out clean. Cool in pan for 5 minutes before removing to wire rack to cool completely.

Enjoy simply sliced or toast in sandwich press and spread with butter!
Recipe modified from taste.com.au

Saturday, September 13, 2008

The World's Most Amazing Food.

A look at the magic that is the food of El Bulli. Click here, sit back, enjoy 9 minutes of heaven, and then attempt to convince your loved one to fly you here immediately!

Friday, September 12, 2008

Balsamic Glazed Dutch Carrots

Mmm... baby carrots. These are one of my favourite things to pick up at grower's markets. They are sweeter than large carrots and look so much nicer when served.

I made these quite a while ago, and just kind of threw bits and pieces together, so will try and put some measurements in for you - just adjust the amount of sugar depending on how sweet you like your savoury dishes. I just add a little, taste, add a bit more, taste... the same process you use when seasoning with salt.

1 bunch dutch carrots
1/2 cup balsamic vinegar
1 -2 tbsp brown sugar
good knob of butter
fresh thyme

Peel the carrots and remove most of the stem, leaving about 1cm intact (it looks prettier this way!). Simmer very gently in a pot of salted water until tender but not mushy. If you boil them, you risk the outside being overcooked before the inside is ready.

Put balsamic vinegar in a shallow saucepan and bring to boil. Continue cooking until the vinegar has reduced by about half. Add brown sugar to taste, and stir until dissolved. Add a good knob of butter and stir until smooth.

Drain carrots, and coat with the vinegar mix and some fresh thyme leaves. Season and serve with your favourite Sunday roast!

Thursday, September 11, 2008

Bill's Spicy Fried Chicken

When my partner told me he wanted to cook me this for dinner I was in two minds. Firstly, he doesn't cook very often, so I was excited and wanted to support him in his endeavour. But secondly, the title of the recipe includes the word fried. This usually is enough to stop me from cooking a recipe at home, as I usually try to reserve my fat intake for desserts/cakes/cookies etc! I was also apprehensive as my partner doesn't like to cook chicken that contains bones (after an unfortunate incident in which he served his parents undercooked chook!) and I feared that fried chicken breast would be dry and tough. Bill swears in his book that poaching the chicken in coconut milk before frying keeps the chicken moist and juicy, but it turned out that my fears were confirmed. The centre of each piece was still moist, but the edges were quite dry. Perhaps it would have been okay if we had have used chicken on the bone?

It was, however, edible and quite tasty. We ate it with a simple salad of leaves, cucumber and cherry tomatoes and a LOT of sweet chilli sauce.

Spicy Fried Chicken

1 cup coconut milk
zest of 1 lime
2 asian red shallots, chopped
3 cloves garlic, crushed
2cm piece ginger, sliced
3 green chillies, chopped
1 tsp turmeric
1 tbsp salt
1.5kg chicken, cut into 16 pieces
veg oil for frying
sweet chilli sauce to serve

Place coconut milk, lime zest, shallots, ginger, garlic, chilli, turmeric, salt and 2 and 1/2 cups water into a large saucepan and bring to a gentle simmer. Add chicken and cook gently for 20 minutes or until tender and just cooked. Remove from saucepan and leave to cool on a wire rack.

Heat oil in a wok or deep frying pan over high heat. Cook the chicken in batches (do not overcrowd) until golden. Drain on paper towel and serve hot with sweet chilli sauce. Serves 4.

Recipe from Bill's Sydney Food.

Tuesday, September 9, 2008

That's what I want!

This is what I would love to have in front of me right now - best espresso in Sydney from Single Origin.

Monday, September 8, 2008

Risotto with Prosciutto and Goat's Cheese

This is a deliciously rich risotto - definately one for a day when you feel like spoiling yourself. Go easy on the goat's cheese if you are not a big fan, or if you are like me, go for the strongest one you can find. Also, try to chop the celery as fine as you can, otherwise, they may not soften enough and you might end up with crunchy bits in your risotto! The base risotto can be used to make any type of risotto you like - other favourites of mine are mushroom, asparagus, or just plain cheesy risotto with some lemon zest and a good squeeze of lemon juice. Yum!

Approx 1.1 litres chicken stock (substitute veg if using for a vegetarian risotto)
1 tbsp olive oil
3 shallots, finely chopped
2 cloves of garlic, finely chopped
1/2 head celery, finely chopped
400g arborio rice
2 wine glasses of white wine
70g butter
115g freshly grated parmasan cheese

2 handfuls fresh lemon thyme, leaves picked
115g freshly grated pecorino
155g goat's cheese
8 slices prosciutto

Heat the stock. In a separate pan, heat the olive oil. Add shallots, garlic and celery and cook gently for 5 minutes, until softened but not coloured. Add rice, and turn up the heat. Stir constantly for 1 minute, until the rice looks slightly translucent. Add the wine and continue stirring until the wine has cooked into the rice.

Add the lemon thyme, and then the stock one ladleful at a time, stirring until it is fully absorbed before adding the next ladleful. Have the heat at a simmer, so the outside of the rice doesn't cook too quickly. Continue adding stock until the rice is soft but with a slight bite to it.

Remove from the heat, and gently stir in the butter, parmasan and pecorino. Season to taste. Place a lid on the pan and allow to rest for 2-3 minutes. Divide into bowls, lay over the prosciutto slices, and top with a generous serve of crumbled goat's cheese. Serves 6.

Recipe from The Return of the Naked Chef

Lamb Shank and Prune Tagine


Mmm... prunes. What to do with leftover prunes? Why, tagine of course!
This was a sneaky thing for me to cook, as my partner is not a fan of prunes. However, he is also not a fan of mushrooms and I manage to put them in most things so thought, why not give this a go?
The finished product was lovely and sticky, and the lamb was falling off the bone. Perfect Sunday night food.

4 frenched lamb shanks (serves 4)
1 tbsp oil
30g butter
1 onion, chopped
1/2 tsp ground ginger
2 cinnamon sticks
4 coriander sprigs
zest of 1/2 a lemon (in wide strips)
300g pitted prunes
2 tbsp honey
1 tbsp toasted sesame seeds
couscous to serve

Heat a heavy based saucepan over high heat, add oil and butter, and when hot, add the lamb shanks. Brown on all sides and remove from pot. Reduce heat to medium, add onion, and cook gently until softened but not coloured. Add 375ml of water, ground ginger and cinnamon sticks. Tie coriander sprigs in a bunch (for easy removal later) and add to pot. Stir well, then return lamb shanks to pot. Cover and simmer for 1 hour.

Add lemon zest and cook for further 30 minutes. Add the prunes and honey, stir, and simmer for another 30 mins or until meat is very tender and almost falling from the bone. Remove coriander sprigs and discard. Serve hot with couscous and sprinkle with toasted sesame seeds. Delish!

Recipe from Cooking Moroccan

Jam Drops


An oldie but a goodie.
I make these whenever I'm having a cup of tea and have a sudden craving for biscuits. We don't buy biscuits in our house as they are so easy to make - although, I must confess that I am known for passing over recipes (like this one) that involve creaming the butter and sugar when I am feeling lazy. Oh, to have an electric mixer!

Basic biscuit dough

125g butter, softened
1/2 cup caster sugar
1/2 tsp vanilla extract
1 egg
2 cups plain flour
1 tsp baking powder
1 tbsp milk

Preheat oven to 180C. Line 2 baking trays with baking paper.

Combine butter, sugar and vanilla until pale and creamy (use an electric mixer if you are lucky enough to have one!) Add egg and mix until well combined. Sift flour and baking powder over butter mix, add milk and stir until just combined.

Roll 2 tsp of dough into a ball, place on baking tray and flatten slightly with the palm of your hand. Repeat for all dough, allowing room for spreading. Dip the handle of a wooden spoon in plain flour, and use to make a small indentation in the top of each biscuit. Fill with 1/4 tsp of your favourite jam (I usually use raspberry but any jam would be good).

Bake for 12 -14 minutes, swapping trays from top to bottom halfway through. Remove when lightly golden. Allow to cool on tray for 5 minutes, then transfer to a wire rack to cool completely. Makes 30.

Recipe from taste.com.au