Every year for the past 12 years, a friend of ours has thrown a Christmas party. It is a major event on our calendar, about 30 of us get together and spend the afternoon/night eating, drinking and being merry.
When we moved to Sydney last year, we were the 3rd couple from our group living here. Work commitments meant that none of us would make it to Melbourne for the annual, and seeing it was the first Christmas in Sydney for both Sis and MJ, and BF and I, the 6 of us decided to start our own Sydney tradition.
You would think that between Sis and I, we would work at whipping up a big fancy feast, but no. The other couple, SteveKat, were moving back to Melbourne just before Christmas, and MJ had been raving about this amazing chicken takeaway that he and Sis had found just near their house. Boys being boys, Steve decided that he MUST try said chicken before leaving Sydney. Thus, The Sydney Chicken Christmas Dinner was born.
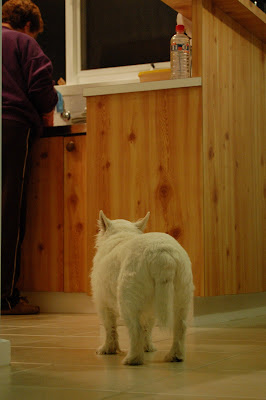
This year, there were just the four of us, and Sampson (Sis' cat!). After the craziness of December, it is nice to just relax with some good takeaway, a beer or two, a bottle of wine, and good company.
I know, you want to know about the food - barbeque chicken, hot chips, tabouli, toum and chilli sauce. MJ always makes sure to get extra toum and chilli sauce because we eat so much of it! Toum is a deliciously creamy garlic sauce made mostly from garlic and oil, is very pungent and addictive. A rather modest spread for Christmas, but a new tradition. It also means that by the time we all make it to Melbourne (I fly tonight!) that we have not overdone the Christmas foods early.
I'm off to finish packing now - wishing you all a very Merry Christmas full of laughter, fun and food!
Wednesday, December 24, 2008
Sunday, December 21, 2008
The Twice (!) Baked, Not Quite Souffle, Lemon Mousse
Confused?
The highlight of our dinner with Sis and MJ was supposed to be dessert. I know what you are thinking - after homemade pasta with rabbit sauce, it was the dessert that is the hightlight? But I was in the mood to impress.
Dessert did impress. But not for the right reasons! It was supposed to be lemon souffle. Not the easiest dessert to make (and definitely the hardest to photograph - apologies for the dodgy shots! They sank sooo quickly!) I got the recipe from a Commercial Cookery text book, and forgot that the cooking times would have been for an industrial fan-forced combi-oven. Basically, I should have doubled the cooking time for my home oven!
I did make the mixture correctly, and had I cooked them for the appropriate time (24 minutes) I think they would have been great. Unfortunately I didn't realise my mistake until we had eaten them! I first took them out after 13 minutes, served them, and after 1 spoonful realised they were undercooked. Sis and I put ours back in the oven, but BF and MJ were enjoying their lemon "mousse" so much that they declined the extra cooking time! After 4 more minutes, Sis and I took ours back out - the edges where much more souffle-like, but the centres were still completely mousse-like. Ah well, we ate them anyway! And for warm lemon mousse, they were rather nice!
I'll put the recipe here in case you are game enough to try them - you will need to cook for about 24 minutes, but I totally suggest a trial run if you don't want the same thing happening to you! All ovens are slightly different and souffles are fussy, so it may take a few tries to get the exact times for your oven.
Pastry Cream
3 egg yolks
60g castor sugar
20g plain flour
200mls milk
vanilla essence to taste
Whisk egg yolks and sugar until almost white, then mix in the flour. Bring milk to scald point (just before it boils), whisk it onto the egg mixture, return to a clean pan, and stir over medium heat until it thickens (it will start to look like custard). Add a few drops of vanilla and taste to check that the raw flour flavour is gone - if not, keep stirring over heat until it is. Pour into a bowl and cover with cling film, ensuring the cling film is pressed against the pastry cream to prevent a skin forming. If you are making this for a dinner party, you can prepare up to this point ahead of time.
Souffle
zest and juice of 1 lemon
1 egg yolk
1 tsp castor sugar
4 egg whites
butter for greasing
Preheat oven to 200C.
Add the egg yolk, zest and lemon juice to your pastry cream. Grease 4 ramekins with butter, place in fridge for 5 minutes, then remove and grease again with butter. Ensure that you do not miss any spots of the mould (this will cause the souffle to rise unevenly). Sprinkle sugar into each mould and move the mould around to ensure every inch is covered with sugar (for the same reasons as above).
Whisk the egg whites to firm peaks (add a little sugar partway through). Fold the whites into your pastry cream in 2 stages, first 1/4 of the whites, then the rest, as this helps to ensure maximum air retention.
Place into greased moulds, smooth the tops and place in oven for approx 24 minutes. Cross fingers, toes, arms etc and if successful, impress the pants off your guests!
Ooh, don't worry if the top of your souffle gets quite brown whilst cooking - it is more important the the centre is cooked. If the top is too dark for your liking, dust with generous amounts of icing sugar and ta da!
Friday, December 19, 2008
Fresh Parpadelle with Rabbit, Olives and Marjoram
Below was the starter, so now on to main! I had been wanting to cook this dish for a while, but as a whole rabbit costs around $25, I wanted to cook it for more than just the two of us. So this dish was the plat du jour for our dinner with Sis and MJ.
As it is now summer, a lot of butchers do not have rabbits readily on hand. However, if you call a day in advance, the lovely boys at Hudson Meats will get one in for you and prepare it as you request. For this dish, I had the rabbit jointed (8 pieces).
Now for my grumbles. Part way through cooking, I noticed that it looked absolutely nothing like the picture in the book. Normally this isn't such a worry, but my concern was that my dish was completely the wrong colour. The photo in the book shows the sauce as having a red-ish tinge, and also there are flecks of what looks like chilli. As you can see in my picture, there is no red in sight. I read, re-read and then read it again. There are absolutely no red ingredients in either the ingredients list or mentioned in the method. Unconvinced, I then made Sis double check. She agreed with me, I grumbled some more, then finished cooking. Our thought is possibly that the recipe should have called for red wine instead of white?
As for the fresh parpadelle, upon tasting this, MJ proclaimed it the best pasta ever. He went as far to say that it craps all over the pasta that he makes at home, and that it was even better than the pasta we ate at A Tavola in July. And they make some very awesome pasta. Yay to me! All my practice making fresh pasta is paying off - this was definitely the best batch I have made. I made this dough a little wetter than usual (by adding extra egg yolks one at a time until I was happy with the dough), kneaded it a bit more than usual, and then stored the whole sheets in the fridge separated by baking paper until I was ready to cook it.
This recipe is best started the day before, to allow the meat to marinate longer, but you could marinate it for as little as 4 hours if in a pinch.
Marinade
small bunch of thyme, leaves picked
6 cloves garlic, unpeeled and squashed
zest of 1 lemon
olive oil
1 rabbit, jointed
Mix the above ingredients together and rub them onto your rabbit pieces. Leave to marinate in the fridge overnight.
To cook the rabbit
olive oil
knob of butter
few sprigs thyme
2 sprigs fresh rosemary
4 cloves garlic, unpeeled
1 bottle white wine
On the serving day - preheat the oven to 180C. In a large, oven proof saucepan, heat a splash of olive oil with the knob of butter. Season the rabbit, add it to the pan and brown the pieces until golden. Add the thyme, rosemary and garlic, stir, then pour in the wine - it should just cover the meat (use more or less as necessary). Put the lid on, place in the oven, and cook for around 2 hours, or until the meat pulls easily away from the bone. When cooked, remove from the oven and allow meat to cool.
Whilst the rabbit is cooking, make your pasta.
Sauce
small handful good quality green olives, stoned and roughly chopped
bunch fresh marjoram, leaves picked
freshly grated parmesan cheese
zest of half a lemon
knob of butter
When the meat has cooled, use your hands to shred it away from the bones. Discard the bones. Remove the garlic, rosemary and thyme from the pan, then put the pan on the heat to reduce the cooking liquid until slightly thickened. Turn down to low, and stir in the rabbit meat, olives and marjoram.
Cook your pasta in plenty of boiling salted water. Drain, reserving a little of the cooking water. Turn up the heat under the sauce, add the pasta and check for seasoning. Turn the heat off, add the butter and a handful of parmesan, and stir through. Quickly add the lemon zest, and add some of the reserved cooking water if the sauce needs loosening. Serve immediately and enjoy!
Recipe adapted from Jamie Oliver's Cook with Jamie.
As it is now summer, a lot of butchers do not have rabbits readily on hand. However, if you call a day in advance, the lovely boys at Hudson Meats will get one in for you and prepare it as you request. For this dish, I had the rabbit jointed (8 pieces).
Now for my grumbles. Part way through cooking, I noticed that it looked absolutely nothing like the picture in the book. Normally this isn't such a worry, but my concern was that my dish was completely the wrong colour. The photo in the book shows the sauce as having a red-ish tinge, and also there are flecks of what looks like chilli. As you can see in my picture, there is no red in sight. I read, re-read and then read it again. There are absolutely no red ingredients in either the ingredients list or mentioned in the method. Unconvinced, I then made Sis double check. She agreed with me, I grumbled some more, then finished cooking. Our thought is possibly that the recipe should have called for red wine instead of white?
As for the fresh parpadelle, upon tasting this, MJ proclaimed it the best pasta ever. He went as far to say that it craps all over the pasta that he makes at home, and that it was even better than the pasta we ate at A Tavola in July. And they make some very awesome pasta. Yay to me! All my practice making fresh pasta is paying off - this was definitely the best batch I have made. I made this dough a little wetter than usual (by adding extra egg yolks one at a time until I was happy with the dough), kneaded it a bit more than usual, and then stored the whole sheets in the fridge separated by baking paper until I was ready to cook it.
This recipe is best started the day before, to allow the meat to marinate longer, but you could marinate it for as little as 4 hours if in a pinch.
Marinade
small bunch of thyme, leaves picked
6 cloves garlic, unpeeled and squashed
zest of 1 lemon
olive oil
1 rabbit, jointed
Mix the above ingredients together and rub them onto your rabbit pieces. Leave to marinate in the fridge overnight.
To cook the rabbit
olive oil
knob of butter
few sprigs thyme
2 sprigs fresh rosemary
4 cloves garlic, unpeeled
1 bottle white wine
On the serving day - preheat the oven to 180C. In a large, oven proof saucepan, heat a splash of olive oil with the knob of butter. Season the rabbit, add it to the pan and brown the pieces until golden. Add the thyme, rosemary and garlic, stir, then pour in the wine - it should just cover the meat (use more or less as necessary). Put the lid on, place in the oven, and cook for around 2 hours, or until the meat pulls easily away from the bone. When cooked, remove from the oven and allow meat to cool.
Whilst the rabbit is cooking, make your pasta.
Sauce
small handful good quality green olives, stoned and roughly chopped
bunch fresh marjoram, leaves picked
freshly grated parmesan cheese
zest of half a lemon
knob of butter
When the meat has cooled, use your hands to shred it away from the bones. Discard the bones. Remove the garlic, rosemary and thyme from the pan, then put the pan on the heat to reduce the cooking liquid until slightly thickened. Turn down to low, and stir in the rabbit meat, olives and marjoram.
Cook your pasta in plenty of boiling salted water. Drain, reserving a little of the cooking water. Turn up the heat under the sauce, add the pasta and check for seasoning. Turn the heat off, add the butter and a handful of parmesan, and stir through. Quickly add the lemon zest, and add some of the reserved cooking water if the sauce needs loosening. Serve immediately and enjoy!
Recipe adapted from Jamie Oliver's Cook with Jamie.
Wednesday, December 17, 2008
Spiced Smashed Chickpeas
I have made this a few times now and it always goes down well. This time I made it as a light starter when I made dinner for Sis and MJ. I was making fresh pasta for main (again - I love it!), so I didn't want to serve an entree. Instead I made this and also some almonds which I panfried in a little olive oil and then tossed with some sea salt and dried chilli. They were awesome - so good that we ate them all before I realised that I hadn't gotten a photo!
This recipe is disgustingly easy. If you have a large morter and pestle, you can fit the whole lot in there, just add the chickpeas a little at a time to avoid them flying across the room! If you only have a small one, then you will need to smash them in batches. Alternatively, you lucky people with food processors could make it in there!
1 x 400g can chickpeas, drained and rinsed
1 tsp cumin powder
2 dried chillies
1 clove garlic
juice of 1 lemon
olive oil
Crush the garlic and chillies in a morter and pestle with a little salt. Add the chickpeas a bit at a time, crushing them before you add the next lot. Add in your cumin, lemon juice and season with salt and pepper, mash around a bit, then add olive oil to loosen a bit.
Recipe adapted from Jamie Oliver's The Return of the Naked Chef.
Tuesday, December 16, 2008
Fresh Pasta with a Ragu of Tiny Meatballs
This is a really easy dish to make - it doesn't take too long and it is very tasty. I made it one lazy Saturday afternoon at BF's request. And I'm very glad I did.
The original recipe calls for beef mince, but I noticed the butcher had a pork and veal mix, and thought that would be much tastier. This was the only change that I made, and I'm glad I did, as it made the dish that little bit more than just plain old spaghetti and meatballs.
First things first, make your fresh pasta (recipe here). Either hang it and allow to dry, or place uncut sheets onto baking paper and store in the fridge until ready to cook.
Meatballs
450g pork and veal mince
1 or 2 dried red chillies, crushed
pinch of ground cinnamon
pinch of ground nutmeg
3 cloves garlic, crushed
1 egg
handful freshly grated parmesan
zest of 1 lemon
Mix all ingredients together with your hands. Shape into marble sized balls (I made mine a bit larger than this - lazy!) Place on a tray and put in the fridge.
Tomato Sauce
olive oil
3 cloves garlic, crushed
1 bunch fresh basil, leaves picked and stalks chopped
1 fresh red chilli, whole and pierced with the tip of a knife
2 x 400g tins tomatoes
small swig red wine vinegar
Heat up a little olive oil in a pan, and fry the garlic, basil stalks and the whole chilli. Add the tomatoes and vinegar, season with salt and pepper, and simmer for about half an hour.
Extras
knob of butter
handful of freshly grated parmesan
Meanwhile, heat up a frying pan with a little olive oil, then add the meatballs. Cook until they are well coloured, then add them to the tomato sauce. Remove the chilli, and continue to simmer for about 10 minutes, or until the meatballs are cooked through.
When the meatballs are almost done, cook your pasta in a big pot of salted water for 2 or 3 minutes. Drain, add the pasta to the sauce along with the butter and parmesan. Tear over half the basil leaves and toss it all around. Serve topped with extra parmesan and the remaining basil leaves. Serves 4
Recipe adapted from Jamie Oliver's Cook With Jamie.
Tuesday, December 9, 2008
Blueberry Pancakes
A couple of weeks ago I woke up on a Sunday morning starving, and with no idea what it was that I wanted to eat. BF was very quick to suggest pancakes, and pointed out that there was a punnet of blueberries in the fridge. Problem solved. I'm not one to say no to pancakes, and definitely think they are better with fruit involved, either cooked in or served on top. My exception to this is when I am hungover - then they MUST be served with bacon, fried eggs and maple syrup!!
This recipe is just a modified version of a classic pancake recipe and will serve 4. Basically, you can just use whatever pancake recipe you usually use, and mix in a handful or so of blueberries before you rest the batter. This recipe is especially good for people that are not big fans of blueberries, like BF. He doesn't really eat fresh blueberries, but just try and keep him away from these!
2 cups plain flour
3 tsp baking powder
2 tbsp caster sugar
1 and 1/2 cups milk
2 eggs
60g butter, melted and cooled
1 punnet fresh blueberries
extra butter, for cooking
Sift flour and baking powder into a bowl and stir in the sugar. Whisk together the milk, eggs and butter, and stir into the flour mixture. Stir in the blueberries, cover and allow batter to stand for at least 15 minutes.
Heat a pan over medium heat and pop in a small knob of butter. Pour batter into pan (to desired pancake size) and cook over medium-low heat until small bubbles appear on surface. Flip and cook other side until the pancake is cooked through. Remove to a plate, cover with foil and keep warm in oven at about 150C until all batter is cooked. Serve with lemon and sugar (me), or maple syrup(BF).
Recipe modified from taste.com.au (recipe no longer available on that site - good thing I had a print-out!)
Monday, December 8, 2008
Gingerbread with Royal Icing - A Work (mess!) in Progress
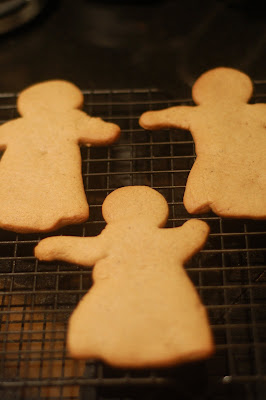
A couple of weeks ago I found some cute Christmas cookie cutters and snapped them up, with a plan to make gingerbread. I've seen so many beautiful iced biscuits and thought that I could make some and put them in with presents. However, I forgot that I am not very artistic and also not very good at piping!The result? A HUGE mess in my tiny kitchen! I learnt some very good lessons though, so hopefully next time round will be more successful!
More strange arms!
I'm not sure if I will use this recipe again because of this, but if you don't want to use cutters, it should be fine. The only changes I made were to the quantities of the spices, as I didn't have any ground cloves on hand. My big cookies took about 15 minutes (for very chewy cookies) and the small ones about 8 minutes (again for very soft chewy cookies).
Gingerbread
125g butter
1/2 cup brown sugar
1/2 cup golden syrup
1 egg yolk
2 cups plain flour
1/2 tsp baking powder
1/2 tsp baking soda
1 tsp ground cinnamon
1 tsp ground ginger
1 tsp ground nutmeg
Cream the butter and sugar until pale. Stir in the golden syrup and the egg yolk. Sift in the flour, baking powder, baking soda, cinnamon, nutmeg and ginger. Stir into the butter mixture, cover and chill for 1 hour.
Preheat the oven to 175C. Roll the dough out between 2 sheets of baking paper until about 5mm thick. Cut with cookie cutters and carefully transfer to baking tray. Place cookies about 5cm apart.
Bake for 8 to 10 minutes (maybe longer for larger cookies or if you prefer your cookies crunchy). Cool on a wire rack. Ice when completely cool.
Recipe adapted from allrecipes.com.au
Royal Icing
1 egg white
1 and 1/2 cups icing sugar
couple drops vanilla essence
food colouring
Whisk white till soft peaks. Sift in the sugar in 3 stages, whisking after each addition. Stir through vanilla.
Separate the icing into bowls - 1 for each colour. Use food colouring to colour each bowl of icing. Fill the sink with hot water. Place cling film over each bowl, pressing the cling film down so that it is touching the icing. This helps prevent the icing from setting. Place each bowl into the sink of hot water so the icing doesn't set.
Use a small piping bag made of baking paper or use a zip lock bag with one corner cut off to pipe onto each cookie. Decorate with sprinkles, cachous etc.
The gingerbread themselves taste great, however, I couldn't get the dough to chill stiff enough for the shapes to hold when I moved them to the baking trays. I even tried putting it in the freezer for 40 minutes but to no avail. You will notice that some of my angels have very uneven arms! This was also the reason why I ended up with so many crazy face gingerbreads - I moulded the circles by hand once I had given up on the cutters.
More strange arms!
Gingerbread
125g butter
1/2 cup brown sugar
1/2 cup golden syrup
1 egg yolk
2 cups plain flour
1/2 tsp baking powder
1/2 tsp baking soda
1 tsp ground cinnamon
1 tsp ground ginger
1 tsp ground nutmeg
Cream the butter and sugar until pale. Stir in the golden syrup and the egg yolk. Sift in the flour, baking powder, baking soda, cinnamon, nutmeg and ginger. Stir into the butter mixture, cover and chill for 1 hour.
Preheat the oven to 175C. Roll the dough out between 2 sheets of baking paper until about 5mm thick. Cut with cookie cutters and carefully transfer to baking tray. Place cookies about 5cm apart.
Bake for 8 to 10 minutes (maybe longer for larger cookies or if you prefer your cookies crunchy). Cool on a wire rack. Ice when completely cool.
Recipe adapted from allrecipes.com.au
Royal Icing
1 egg white
1 and 1/2 cups icing sugar
couple drops vanilla essence
food colouring
Whisk white till soft peaks. Sift in the sugar in 3 stages, whisking after each addition. Stir through vanilla.
Separate the icing into bowls - 1 for each colour. Use food colouring to colour each bowl of icing. Fill the sink with hot water. Place cling film over each bowl, pressing the cling film down so that it is touching the icing. This helps prevent the icing from setting. Place each bowl into the sink of hot water so the icing doesn't set.
Use a small piping bag made of baking paper or use a zip lock bag with one corner cut off to pipe onto each cookie. Decorate with sprinkles, cachous etc.
Sunday, December 7, 2008
My Very First Award!
I woke up this morning, knowing that I had been neglecting the blogging world. I hadn't posted in almost 2 weeks (bad blogger!) and I hadn't really been keeping up with all my favourite reads. I'd completely forgotten how busy this part of the year is. Work is getting busier, which means much longer days, less days off, and there are more events/parties to attend. Add that to the horror that is Christmas shopping and I'm out of time!
So it is a great boost of confidence (read - kick up the arse!) to receive my very first award!! Andrea over at Cooking Books has sent me the Kreativ Blogger Award, which comes with the Seven Things Meme. Thanks Andrea!
It's a long meme guys, so strap yourselves in!
Seven things I say most often
1) Will you be home for dinner?
2) What do you want for dinner?
3) I need a coffee.
4) F*** I hate Sydney! (Melbourne-girl at heart!)
5) This place is such a mess.
6) I need a bigger kitchen!
7) I'm hungry.
Seven things I did before
1) Managed a fast-food restaurant
2) Backpacked in Europe for 2 years
3) Studied paramedics at university
4) Partied until morning and drove home after sunrise
5) Danced (ballroom and jazz) for almost 10 years
6) Got a brown belt in karate
7) Lived off frozen chicken nuggets for a long time (my love of cooking came as a shock to many!)
Seven things I do now
1) Eat too much
2) Neglect cleaning/washing... well, all household duties
3) Constantly spill water on the carpet, couch etc
4) Attempt to go to the gym as much as possible (note: attempt!)
5) Make BF come to the supermarket even though he hates it so he can push the trolley
6) Walk everywhere and hardly ever drive or use public transport
7) Cook!
Seven things I want to do
1) Travel again
2) Work in a hatted restaurant
3) Meet BF's newest nephew who is currently in Seattle (bring on the February visit!)
4) Design my own kitchen
5) Learn to cope with the Sydney humidity
6) Take a holiday to somewhere other than Melbourne!
7) See my brother get married (one day soon!)
Seven things that attract me about the opposite sex
1) Ability to make me laugh
2) Body hair (Men should not wax!)
3) Broad shoulders, as they make for good hugs!
4) Family-oriented
5) Kind-hearted
6) Fun-loving
7) Understands the rule "Since I cooked, you have to wash!"
Seven favourite foods (only seven?!)
1) Chocolate (not the horrible white stuff)
2) Meat pies
3) Cheese (all cheese, but goat and sheep's much more than cow)
4) Hot chips (fries but fatter and better)
5) Home made pasta
6) Chicken parmigiana
7) Anything made by my Aunty J (awesome authentic Lebanese cooking)
Seven people I am tagging
1) Jamie at My Baking Addiction
2) Jaime at Good Eats 'n Sweet Treats
3) Ja at Beansprout's Cafe
4) FFIchiban at Here Comes The Food
5) Simon at Simon Food Favourites
6) Lorraine at Not Quite Nigella
7) Renee at ...and all things nice
As with all memes, it is not compulsory to participate but it is fun!
Monday, November 24, 2008
2 Ways with Mini Muffins
Who doesn't love mini muffins? Some might argue they are too small, but hey - you can have seconds and not feel bad! And they are good for feeding a crowd (the boys at BF's work in this case). They are also a great way to have a little indulgence without feeling too bad about it.
The day I made these I couldn't decide what flavour to make. I had both bananas and strawberries to use up, but wasn't feeling like mixing the two. Of course, I will do anything to add chocolate to a recipe - so banana choc chip become one choice. And I remembered that my sister had once made strawberry rose flavour... I couldn't decide between the two so gave in a made both! BF's workmates were very pleased when they realised that he had brought over 30 muffins to work! And the verdict? They actually preferred the strawberry rose! So did I, but the banana choc chip were a firm favourite for BF. Happy campers all round.
Chocolate Chip Banana Mini Muffins (makes 24)
30g butter
1 cup self raising flour
1/4 cup caster sugar
1/4 cup milk
1 egg
1 overripe banana, mashed
1/2 cup dark chocolate chips
Preheat oven to 200C. Line a mini muffin pan with liners.
Melt butter and cool slightly. Sift flour into mixing bowl and stir in sugar. Make a well in the centre.
Lightly whisk together the egg, milk and butter, and add to the dry ingredients along with the banana. Gently mix until just combined. Stir in choc chips.
Spoon mix into muffin cases and cook for 7 minutes or until a skewer comes out clean.
Strawberry Rose Mini Muffins (makes 24)
1 cup self raising flour
3/8 cup caster sugar
3/8 cup milk
60g butter
1 egg, beaten
1 tsp rosewater essence
1/2 cup chopped strawberries
Preheat oven to 200C. Line a mini muffin pan with liners.
Melt butter and cool slightly. Sift flour into mixing bowl and stir in sugar. Make a well in the centre.
Add milk, butter, egg and rosewater to dry ingredients and stir gently to combine. Stir through strawberries.
Spoon mix into muffin cases and cook for 7 minutes or until a skewer comes out clean.
Both recipes modified from taste.com.au
Sunday, November 23, 2008
Warm Chorizo and Chickpea Salad
I have had a lovely weekend, with plenty of time for cooking. Blueberry pancakes for breakfast, home made pasta last night, banana bread in the oven filling the place with wonderful smells.
But most of the time, this is not what my life is like. Most days I don't want to spend a long time in the kitchen after work, because I would rather be wrapped in a blanket and asleep on the couch! This meal came from a night like that. I wanted to be in and out of the kitchen in the shortest possible time, but still eat something tasty and nutritious. The result? 10 minute chorizo salad!
This salad was literally just a combination of items that I had in my fridge/cupboard at the time. I don't quite remember how much of some of the things I used, but being a salad, measurements don't really matter! This makes enough for 2 hungry people, but if you aren't huge fans of chorizo, you should cut down to 1 sausage, as 2 is a quite meat heavy salad.
2 chorizo sausages, sliced
1 440g can chickpeas, drained and rinsed
1 small block feta cheese
1 tomato
1 lebanese cucumber
1/2 red capsicum
1 small red shallot
rocket
red wine vinegar
olive oil
Heat a frying pan with a tiny amount of oil, and add the chorizo slices. Stir occasionally. Whilst cooking, slice shallot, and dice capsicum, cucumber and tomato. Put these in a mixing bowl.
When chorizo is starting to crisp up, add the chickpeas and stir to coat in the oil that has come out of the chorizo. Whilst the chickpeas are warming, make the dressing - 2 parts olive oil to 1 part red wine vinegar (or 3:1 if you like it a little less zingy).
Put the rocket on TOP of the other vegies, then pour the warm ingredients on top. This helps the rocket to wilt down just a touch. Add the dressing, season with salt and pepper and get your hands in to mix it all around.
Divide onto serving plates and crumble feta over the top. Enjoy!
Sunday, November 16, 2008
A Sad Goodbye...
Friday was a sad day for my family. We lost our girl, Amira, after almost 16 years to pneumonia. She was very much a member of the family, my mum's shadow, and a great source of comfort to us all.
She loved raw carrots, broccoli and zucchini, munching on apple cores, and if you blew kissy-noises at her she would come over and give you a kiss.
She enjoyed sitting on a chair at the dining room table to watch us eat as part of the family, and never failed to make us laugh. She will be well remembered and dearly missed.
Saturday, November 15, 2008
Let's Play Tag!
I was surprised and excited this morning to find that I had been tagged by Lorraine at Not Quite Nigella for a meme. It certainly is a confidence booster, especially as NQN is one of the very first blogs I read. Thanks Lorraine!
This meme is 6 random things about me, so... *puts thinking cap on*
1) The first time I baked a cake my brother told me that I had misread the measurement for bi-carb soda and that I was supposed to put 1 tbsp in... needless to say, the cake was inedible and my family didn't allow me to cook for them for many years!
2) I spent a month travelling around France when I was 22 and ate a fruit tartlet from a patisserie every single day.
3) Cooking injuries of mine include: quite a good slice off the side of my left thumb, minor burns on hands, arms and my stomach (rogue oven tray) and partial thickness burns to two fingers on my right hand just last week.
4) I once drove 27,000km around Australia in a 2-door Holden Barina with no air-conditioning.
5) I have the whitest legs in the world. No matter how tanned/sunburned my arms/shoulders/back/face get, my legs insist on staying whiter than white.
6) I find almost all forms of technology extremely difficult to use. I constantly yell at the computer, my mobile phone, and sometimes even the alarm clock. My i-pod shuffle was the first music player I have owned since my old cassette walkman, and I still cannot put songs onto it by myself. I can never work out which remote control I am supposed to use, or which buttons to press. Thankfully, BF is a bit of a computer/technology geek!
Now to tag 6 more people for this meme!
1) Chelle at Brown Eyed Baker
2) Mimi at Mimi on the Move
3) Jessica at Apples and Butter
4) HoneyB at The Life and Loves of Grumpy's Honeybunch
5) Ja at Beansprout's Cafe
6) Pam at For the love of cooking
There is no obligation to participate, but it is good fun!
Here are the rules:
* Link to the person who tagged you
* Post the rules on the blog
* Write 6 random things about yourself
* Tag 6 people at the end of your post
* Let each person know they have been tagged by leaving a comment on their blog
* Let the tagger know when your entry is up
So let's play tag!
Friday, November 14, 2008
Bill's Ricotta Hotcakes
Way back in March, BF and I went to Bill's Surry Hills for breakfast. BF had scrambled eggs, and I had the famous ricotta hotcakes. Since then, I have been meaning to make them at home. You see, I have had the recipe for 12 months now, and just haven't seemed to get round to it.
At the November Good Living Growers' Markets, I bought a delicious tub of ricotta from my favourite cheese shop, Formaggi Ocello. The next day, I finally made the hotcakes.
Bill serves his with banana and honeycomb butter. I had one rather overripe banana, and no honeycomb, so we settled for half a banana each and maple syrup. And thankfully, the hotcakes were just as light as I remembered. This is because the egg whites are beaten and carefully folded into the mix. The batter is very easy to make, and can be kept in the fridge for 24 hours, which is a good thing, because I only made half the recipe and it was enough to feed 4!! Also, if you don't have the honeycomb butter, the mix isn't too bad for you, as it contains no butter AND no sugar!
To serve 4 (or 2 over 2 days)
2/3 cup ricotta
3/8 cup milk
2 eggs, separated
1/2 cup plain flour
1/2 tsp baking powder
25g butter
Combine ricotta, milk and egg yolks in a bowl. Sift in the baking powder and flour, and mix until just combined.
In a separate bowl, whisk the egg whites until stiff peaks form. Fold these into the batter in 2 batches, being gentle and not over mixing.
Heat a non-stick frying pan and grease with a little bit of the butter. Drop 2 tablespoons of batter for each hotcake into the pan (don't cook more than 2 at a time as the pan cools too much). Cook over medium-low heat for about 2 minutes, or until golden underneath. Turn over and cook through. Serve with banana and maple syrup.
Recipe from Bill's Sydney Food.
Bill's Surry Hills
359 Crown Street
Surry Hills NSW
Thursday, November 13, 2008
High Tea at The Tea Rooms, QVB
I have said before that I don't usually take photos of food whilst I am eating out. High Tea was no exception. The food was delivered, we oohed and aahed, and then we tucked in. And halfway through the finger sandwiches, my sister whipped out the camera and decided to take some shots. Hmph. I sat back on my lounge, giggling, as I handmodelled for her with my teapot...
I'm getting ahead of myself. Earlier this week, I managed to burn a couple of fingers on my right hand pretty badly. Bad enough that the doctor gave me a week off work. I also have been struck with a nasty cough, reminiscent of the bronchitis I used to get often as a child. Whilst on the phone with Mum, filling her in on all my current afflictions, she decided to fly up to Sydney and pamper me for the week! Yay!
Sis and I hadn't seen Mum for a good 4 months or so, so as my cough was starting to ease up yesterday, we decided to take Mum sightseeing. Having not been to Sydney before, we showed her the Bridge, and the Opera House, and then went for a lazy wander through the Botanic Gardens.After working up an appetite, we decided to surprise Mum with High Tea. Sis and I had been wanting to try The Tea Rooms for a while, but had never gotten round to it, and thought this was the perfect excuse to do it on a whim. We were offered the choice of tables or lounges, and lounges were the unanimous choice. We sat, relaxed, I chose tea, the others received their glass of sparkling, and we waited for the food to arrive.
And so it goes... The food arrived, and we all tucked in to the finger sandwiches. There were smoked salmon, egg, and ham sandwiches, all done quite simply with not too much to mask the flavour of the main ingredient. The egg sandwiches were definitely my favourite, but how can you go past an egg sandwich? Halfway through them, Sis decided to take photos, so we had to do a bit of artful rearranging of the top tier of the stand to make it look full!!
The top tier also had tiny tarts of polenta and cheese - the waiter said it was blue cheese but Mum and I though it tasted more of Gruyere.
The bottom tier had small toasts topped with eggplant and chorizo - these were delicious and we all agreed that 6 more of these each would not go astray! Also on this tier were scones, 2 plain and 1 fruit scone. Sis and I allowed Mum the choice, both knowing deep down that we were about to miss out on the fruit one - it probably would have been both our first choice! The scones were just warm, a little too firm on the outside, and served with jam and cream. Mum always whips the cream when she makes us scones, so we were a little disappointed that the cream was runny. Also, they obviously recycle leftover cream from other tables, as ours arrived with little bits of someone else's scone in it! However, when pointed out, it was promptly replaced with a smile.
The middle tier was the most impressive looking. Tiny bite-sized sweets, five different varieties, and thankfully, enough of each that we didn't have to share any! With these, we sat back, relaxed and took our time. And we each had a different favourite. Sis enjoyed the passionfruit-cream filled cookies, Mum liked the orange and almond cake topped with lemon curd the best, and my favourite was the pistachio meringue stack. Also here were a pastry boat with cream and strawberry (the cream lacking in flavour) and a sponge filled with jam and custard topped with chocolate and coconut!
For the record, the tea I chose was called Keemun, and is described as a Chinese black tea with an aroma similar to rose or orchid. It was lovely, quite mild, but unfortunately my blocked nose didn't allow me to smell it properly!
All photos courtesy of my lovely sister.
The Tea Room, QVB
455 George St, Sydney
Traditional Afternoon Tea $32 (add $2 for tea for connoisseurs - I did!)
Sparkling Afternoon Tea $37 (same as above but with a glass of Australian Sparkling wine)
Sunday, November 9, 2008
Cocoa Brownie Bites to die for...
In need of a chocolate fix (hmmm, isn't that all the time?), I went window shopping through my favourite blogs to find a recipe. I had 3 criteria: 1) chocolate (duh) 2) quick, easy and all pantry item ingredients 3) very VERY chocolatey. If it sounds like I have a chocolate issue, I do. It would be the first item on my desert island wish list. It makes me happy. It makes sad movies better. It makes me not care that the rubbish hasn't been taken out, the dishes need washing, or that my oven doesn't work (and it should be getting fixed on Thursday - finally!)
After some searching, I found this recipe of Pam's. Although I was a bit sceptical that cocoa alone could make something as chocolatey as I was craving, Pam's recipes always make me drool onto the keyboard, and this description of her's sold me - "Beware... these are very rich, and according to my husband and daughter, very addicting. They were dense and not too sweet but totally delicious. They had a perfect soft center and a nice crispy crust on top."
Sold! What more could a girl ask for? Well, some additional chocolate chunks of course! The addition of a very heaped 1/3 cup of broken choc chunks was my only change to Pam's recipe. And these brownies were a hit! I was so reluctant to part with them that I only allowed BF to take half of them to work - the rest stayed with me!And just in case you are not already convinced that Pam makes awesome brownies, last week she made them with peanut butter chips in - click here and admire them! If anyone knows where I can buy peanut butter chips in Sydney, please let me know as I am dying to make these!
142g butter (1 and 1/4 sticks)
1 and 1/3 cups white sugar
3/4 cup plus 2 tbsp cocoa
1/4 tsp salt
2 eggs
1/2 tsp vanilla extract
1/2 cup plain flour
very heaped 1/3 cup chocolate chunks
Preheat the oven to 163C (325F). Place oven shelf in bottom third of oven. Grease and line an 8 inch slice tin with baking paper, making sure it hangs over the edge of the two long sides.
In a heat proof bowl, combine butter, sugar, cocoa and salt, place over a pot of hot water and stir occasionally until melted and mixture is hot to touch. The mix should look slightly grainy. Remove from heat and cool slightly, then add vanilla. Mix in the eggs one at a time, stirring well after each one.
When the mix is well blended, smooth and shiny, slowly add the flour and stir until combined thoroughly. Now stir vigourously for 30 strokes (I don't know what this is for but it works! Can anyone explain?) Stir in the chocolate chunks. Pour into slice tin and bake for 20 - 25 minutes, or until a skewer comes out clean.
Leave to cool completely before lifting out and cutting into bite-sized pieces. Remember, bite-sized pieces mean you can have seconds!
Subscribe to:
Posts (Atom)